
How to Wire a 7 Pin 12N Trailer Plug UK — Step by Step with Photos
The UK 12N standard is completely different to the American 7-way connector that most search results describe. This guide covers the correct UK pin assignments, real photos of the process and the farm-specific faults — link arm cable damage and slurry corrosion — that cause most rewiring jobs on agricultural trailers.
UK 12N quick reference
12N pin layout diagram
Viewing the wiring face of the plug — the back of the plug as you connect the wires
| Pin | Wire | Function |
|---|---|---|
| 1 | Yellow | Left indicator |
| 2 | Blue | Rear fog lamp |
| 3 | White | Earth / Ground |
| 4 | Green | Right indicator |
| 5 | Brown | Right tail / sidelight |
| 6 | Red | Brake lights |
| 7 | Black | Left tail / sidelight |
A 7-pin 12N plug opened up — the pin terminals are visible with the strain relief removed, ready for wiring
This is not the same as an American 7-pin connector
The UK and European 12N standard (ISO 1724) uses a completely different pin layout and wire colour code to the American SAE J2863 7-way flat connector used on RVs and trucks in the USA. If a wiring guide mentions breakaway switches, brake controllers or round pin numbers starting with pin 1 at the bottom — it is describing an American connector. Use the pin diagram and wire colours in this guide for UK tractors and trailers.
What you need
How to wire a 7 pin 12N trailer plug — step by step
Identify why the plug needs replacing
Before stripping anything, identify the cause. Is it a cable broken near the plug — usually from link arm damage? Is it corrosion inside the plug from water and slurry? Or is the cable damaged midway along its length?
If the cable is broken near the plug, you may only need to cut back to sound wire and fit a new plug. If the cable is damaged further along, you will need a new length of 7-core cable. Check the full cable run before cutting anything.
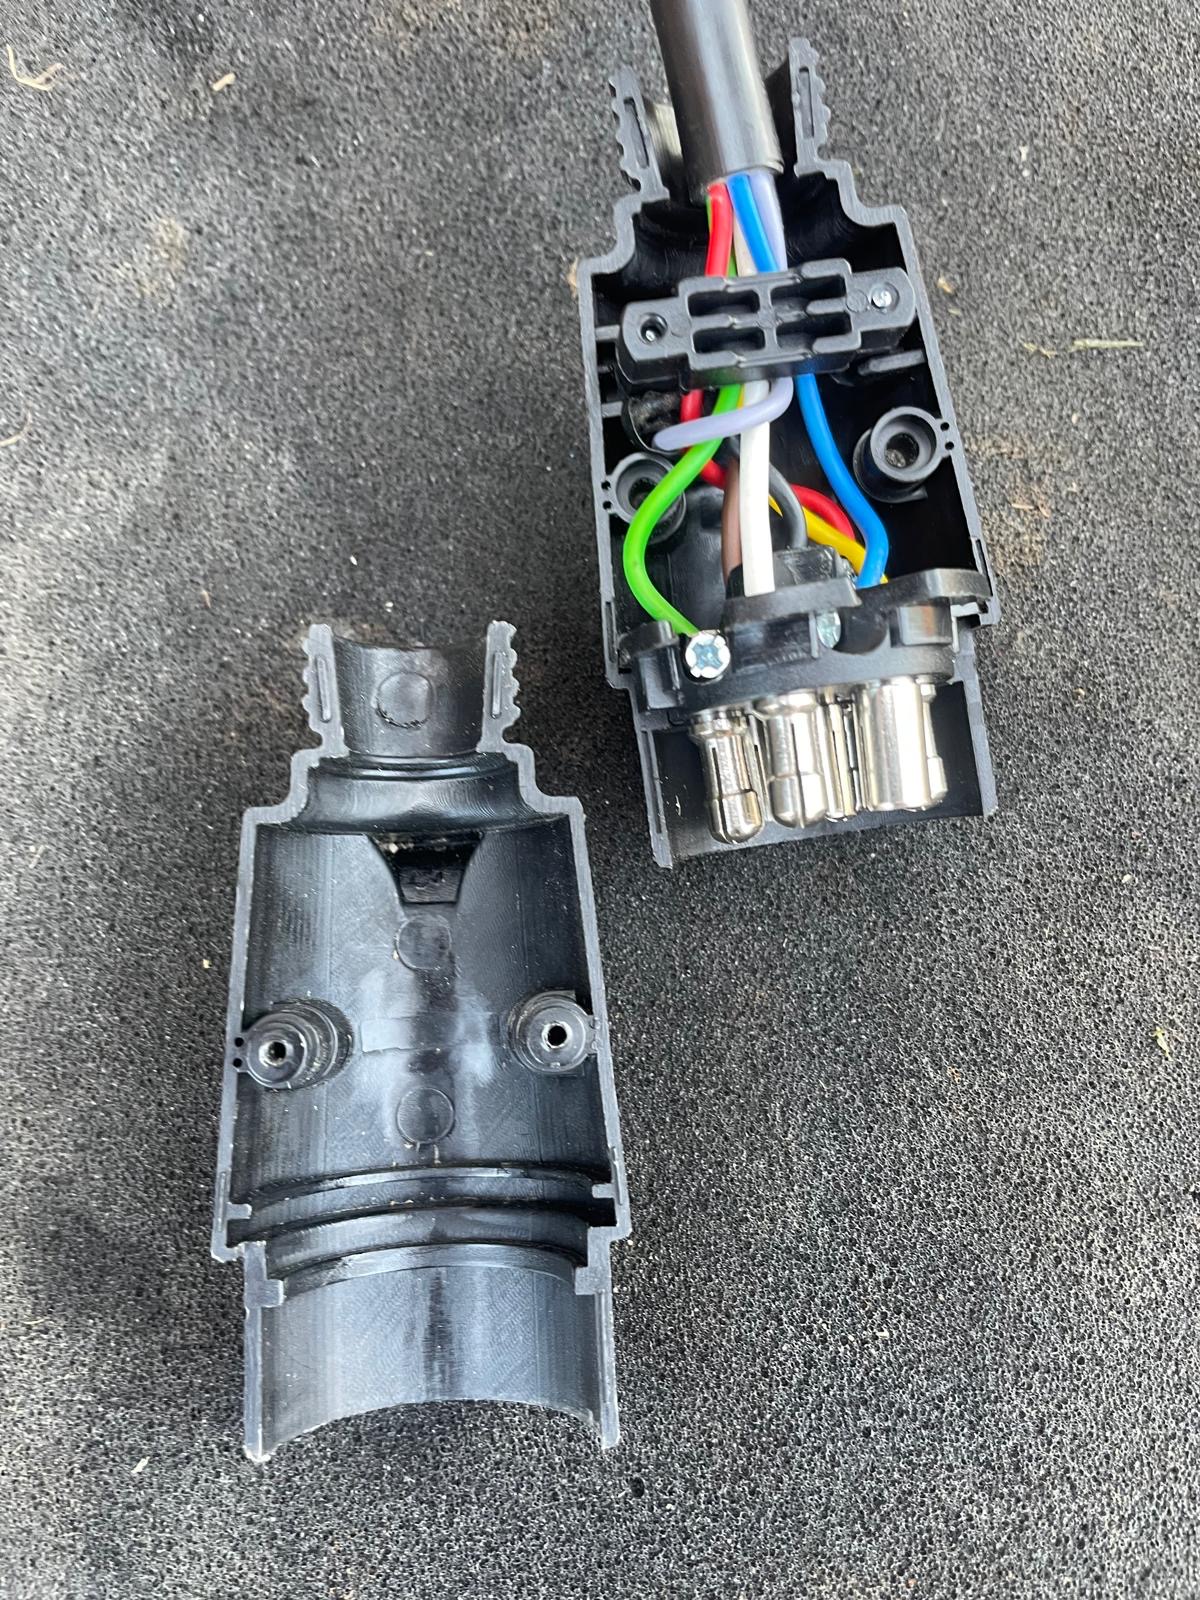
Open the old plug and note the wiring
Unscrew the strain relief nut at the cable entry end of the plug. The plug body should then separate. Take a photo of the existing wiring before removing any wires — the pin numbers are usually moulded into the plastic body and this gives you a reference for the new plug.
Note any signs of corrosion on the terminals. Green-white powder on pin 3 (the white wire terminal) is the most common fault on farm trailer plugs.
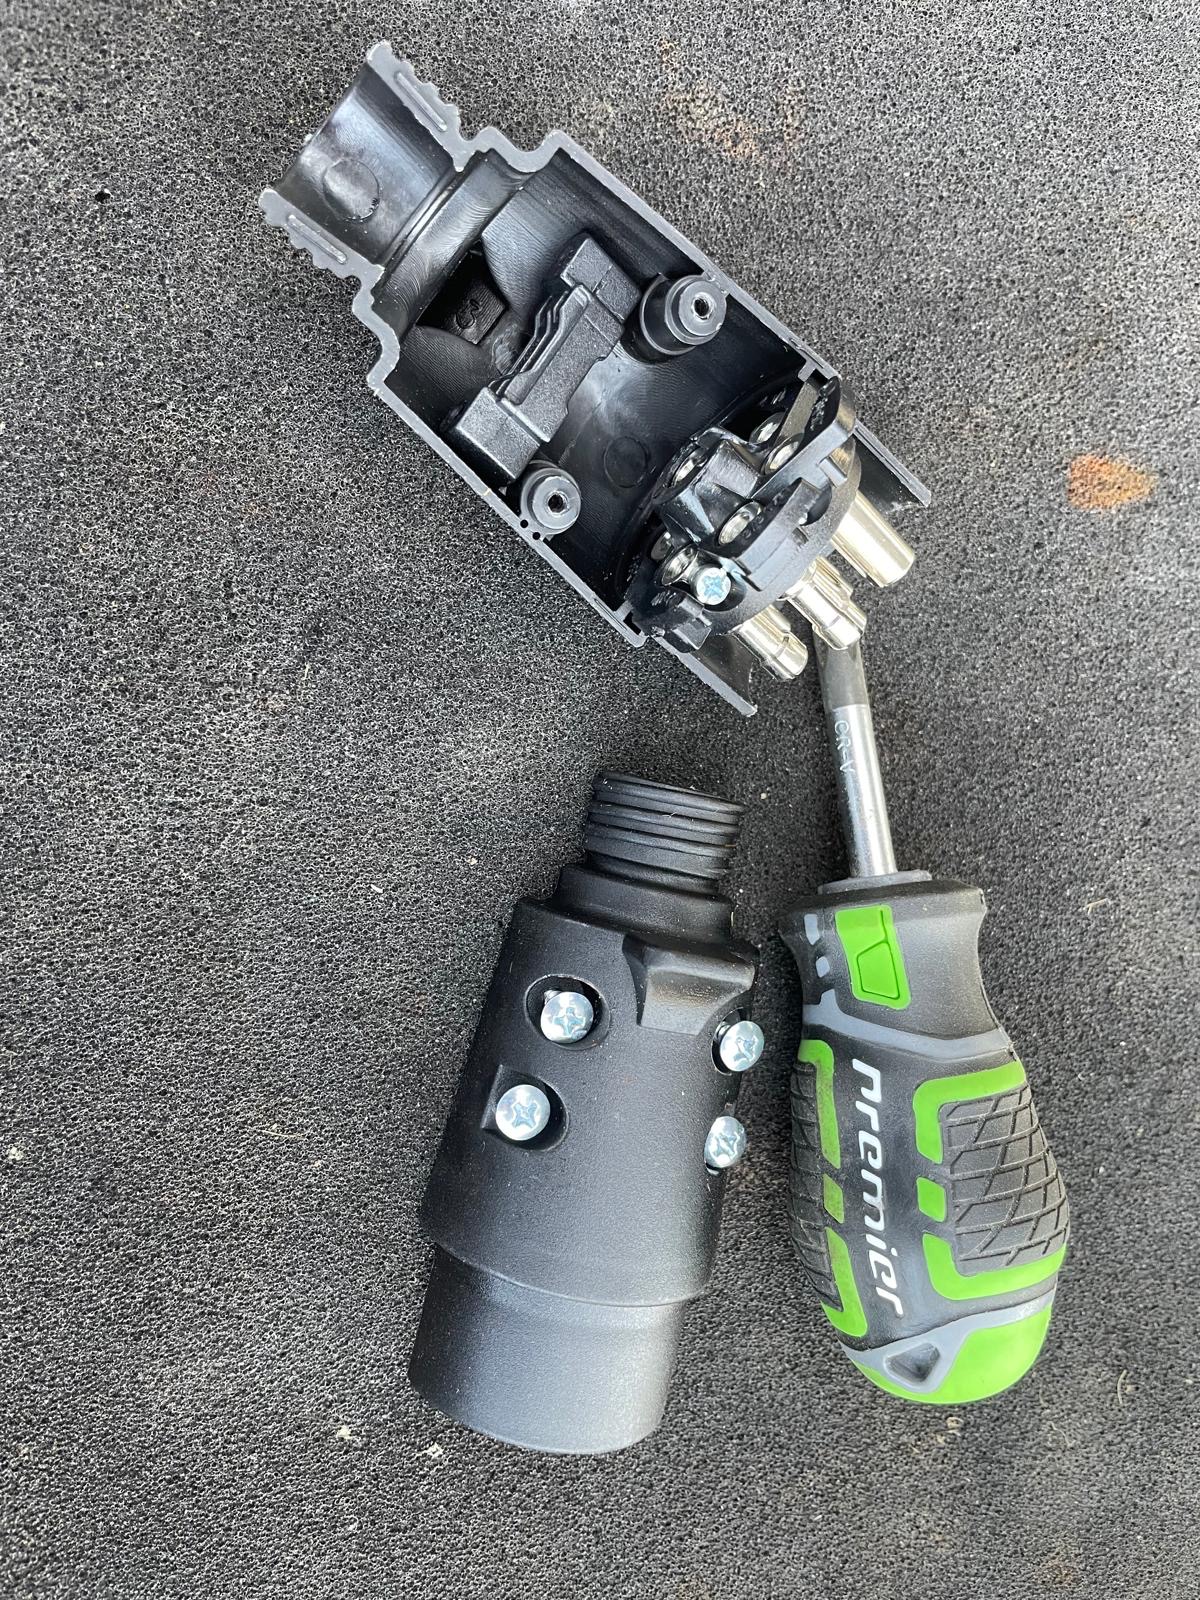
Releasing the terminals inside the plug — a flat-head screwdriver is all that is needed to open most 12N plugs
Prepare the cable — strip and tin the ends
Cut the cable back to clean, undamaged wire. If the cable was damaged by a link arm, cut at least 50mm past the visible damage point — the wire strands inside are often broken further than the visible kink suggests.
Strip approximately 8–10mm of insulation from each core. Do not nick the copper strands — a nicked strand will corrode or break at that point. Strip each wire individually and twist the strands tightly before connecting. Thread the cable through the strain relief nut and plug body before connecting the wires — it is easy to forget this step.
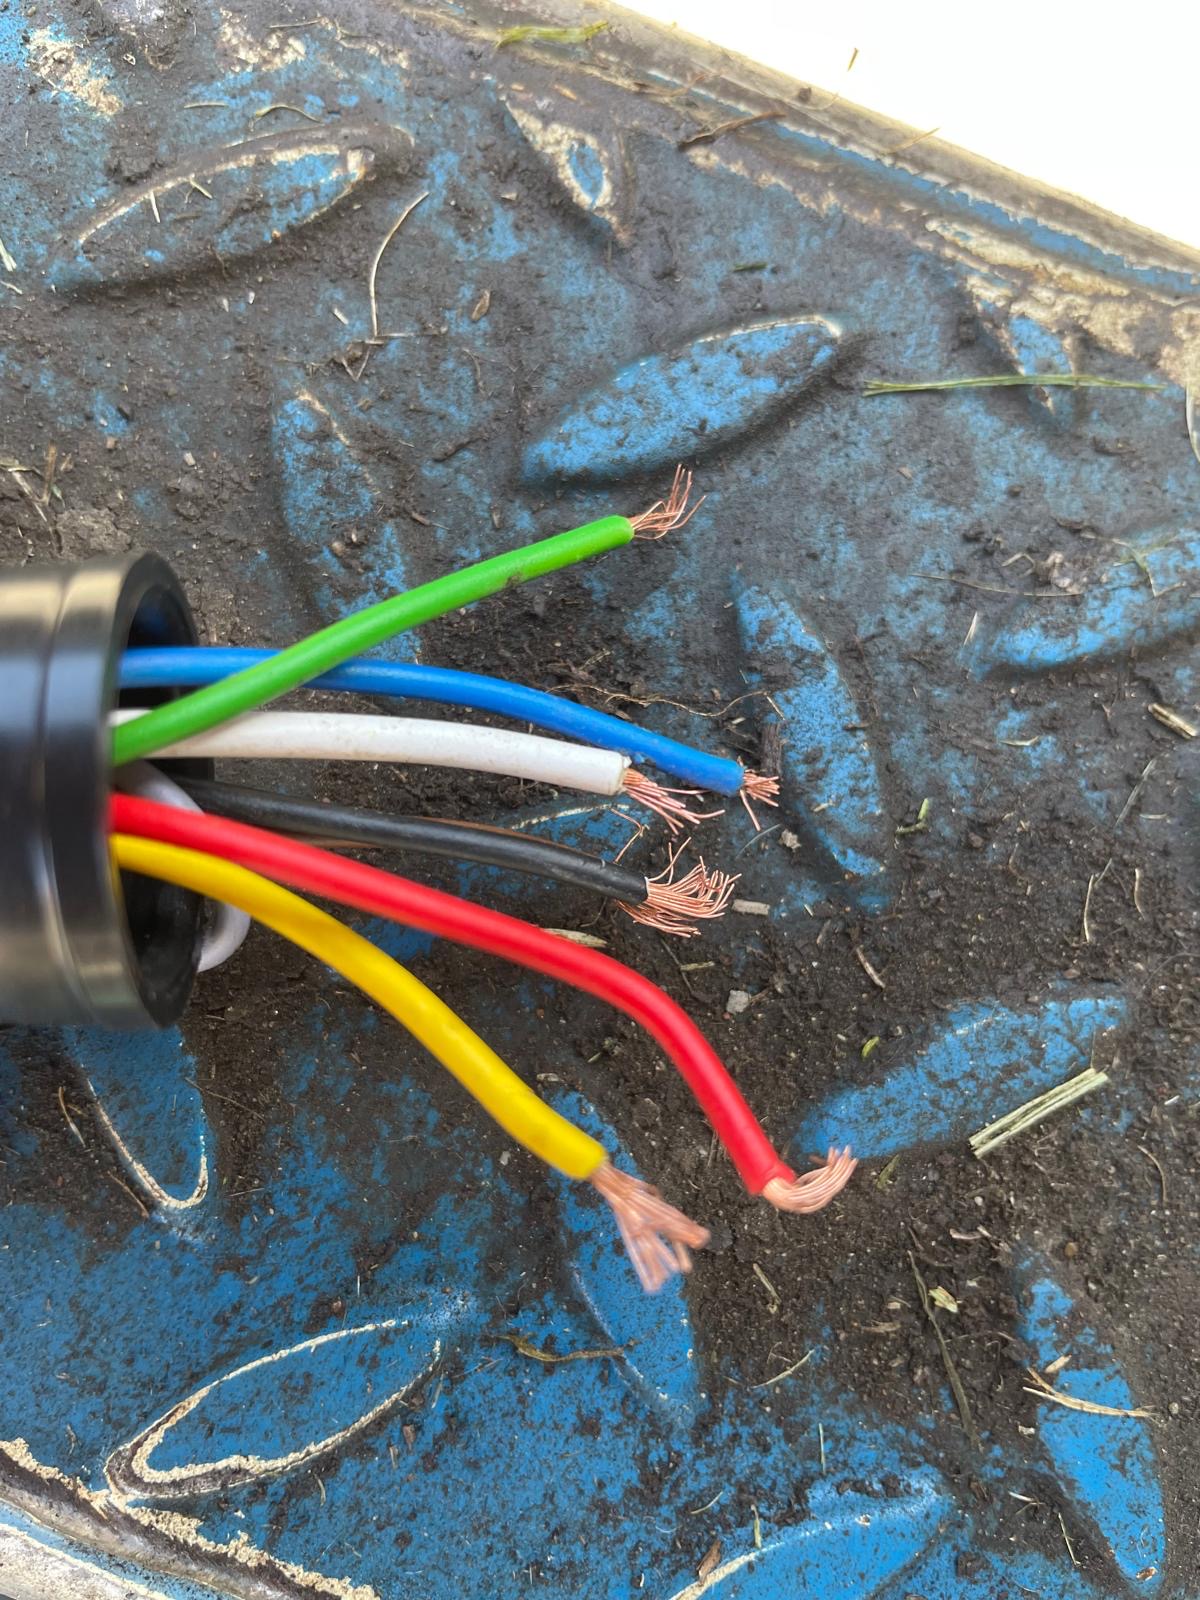
Wires stripped and ready — each core stripped 8–10mm with the copper strands twisted tightly before connecting
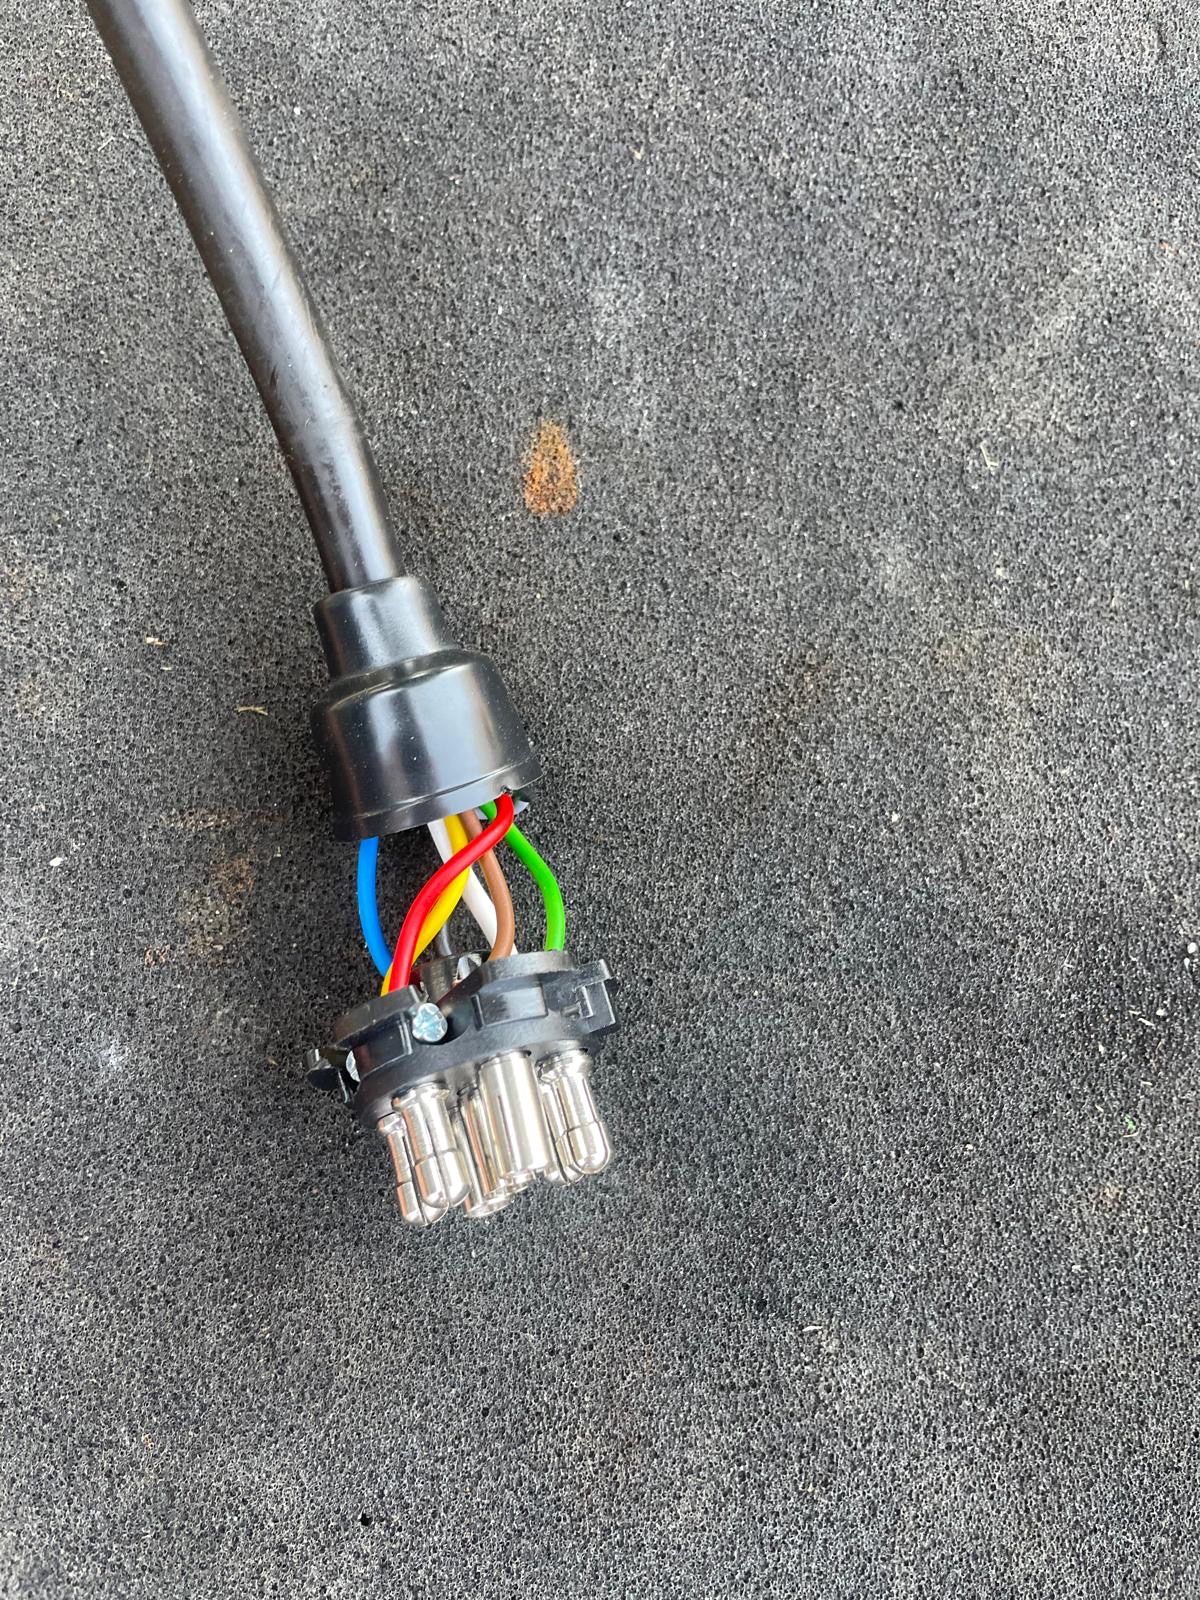
Connect the wires to the correct pins
Connect each wire to its corresponding pin using the reference table above. Pin numbers are moulded into the plug body. The screw terminals clamp the wire into the pin — make sure the bare copper is fully inside the terminal before tightening. No insulation should be caught in the clamp.
Always do pin 3 (white — earth) first and make it the best connection. It is the most important wire in the plug and the most common failure point on farm trailers exposed to slurry and water.
A light application of dielectric grease on each pin terminal after connecting keeps moisture out and makes the plug significantly more resistant to corrosion.
All 7 wires connected — each wire clamped securely into the numbered terminal before closing the plug up
Test before closing up
Before reassembling the plug body, plug it into the tractor socket and test each light function: left indicator, right indicator, brake lights, tail lights and fog lamp. It is much easier to fix a wrong connection now than after the plug is reassembled and strain relief tightened.
If you have a multimeter, check continuity from each pin at the plug face through to the trailer light it feeds. A reading close to 0 ohms on each circuit confirms a sound connection.
Close up and secure the strain relief
Reassemble the plug body and tighten the strain relief nut firmly against the cable outer jacket. The strain relief takes the mechanical load off the wire connections — if it is loose, every time the cable is pulled or flexes the wires work at the terminals and the plug will fail again quickly.
If the trailer is used in wet or slurry-heavy conditions, consider wrapping the assembled plug in self-amalgamating tape at the cable entry point for additional weatherproofing.
Common faults on farm trailers
Agricultural trailer plugs fail in ways that a domestic or road trailer does not — here are the farm-specific causes and what to look for.
Parts and tools for this job
Affiliate links — we may earn a small commission at no extra cost to you